Part 4: Scene Hierarchy
In this section, you will explore how to add multiple GameObjects to the Scene Hierarchy. Additionally, you will learn how to group GameObject to create a child-parent relationship.
Table of contents
What is the Hierarchy?
In Unity, the hierarchy is a crucial component of the scene view that represents the structure of objects within a scene. It functions as a parent-child relationship system, where GameObjects can be organized hierarchically. This hierarchy allows for the transformation and manipulation of objects in a coordinated manner, making it essential for scene organization and interaction in Unity game development.
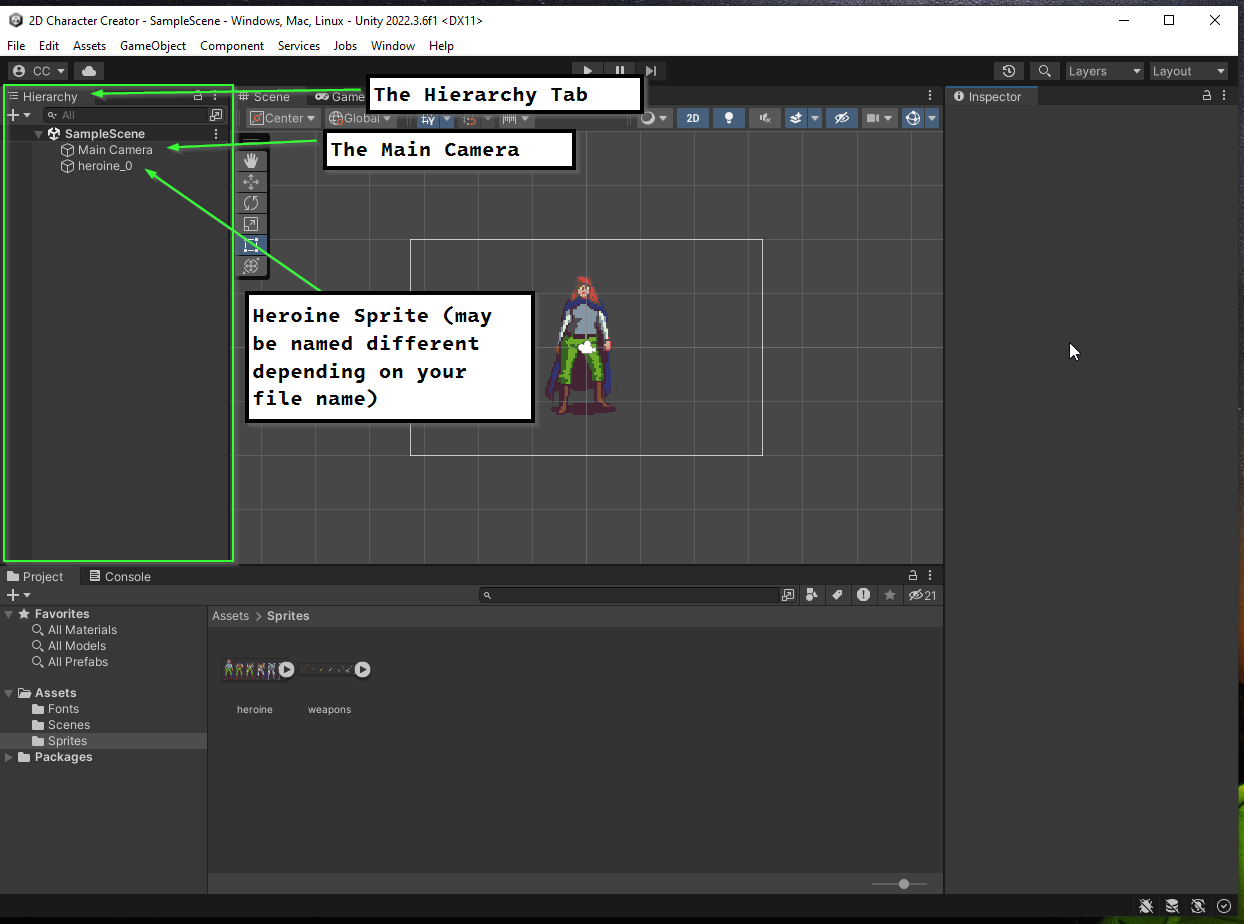
The Hierarchy Tab
In the Default view, the Hierarchy tab is on the left side of the Unity Editor interface. If you have followed instructions int he previous section, you should have two GameObjects in your Scene’s Hierarchy: A Main Camera and an object representing the heroine sprite:
What is a GameObject?
In Unity, a Game Object is a fundamental building block of a scene, representing any element that can be placed in the game world. It acts as a container for various components and functionalities. Game Objects can represent characters, items, props, lights, cameras, and more, and they are crucial for creating interactive and dynamic experiences in Unity game development.
Renaming a GameObject
Every GameObject in a Scene has a name. To help stay organized, it is important to try and name them appropriately. The Heroine sprite you added will be the base for the character in the scene. Rename the object Heroine Base.
To rename a GameObject:
- Right Click on the GameObject in the Hierarchy
- Select
Rename - Enter the desired name
- Press Enter
Add an Armor GameObject
Next, add a new GameObject to represent the player’s current armor.
- Select a sprite from the armor set and drag it into the scene
- Rename the GameObject
Armor
Child GameObjects
You may be finding it difficult to align your Armor GameObject with your Heroine Base. The sprite is setup such that setting the positions to match will align them. However, this is quite tedious to do (especially if your player is not centered on the screen).
To make elements easier to manage, you can nest GameObjects within each other to group them together. To do this, you can drag a GameObject in the Hierarchy into another:
- Select the
ArmorGameObject - In the Hierarchy, drag it into the
Heroine BaseGameObject
When we group one GameObject within another, we say that it is a child of that object. In this case, Armor is a child of Heroine Base. Similarly, Heroine Base is a parent of Armor.
Aligning the Armor
To align the Armor GameObject, we need to adjust its Transform component.
What is a Transform?
In Unity, a Transform is a component of a Game Object that defines its position, rotation, and scale in the 3D or 2D world. It’s a fundamental component for spatial representation and manipulation of objects within a scene, allowing developers to control their location, orientation, and size.
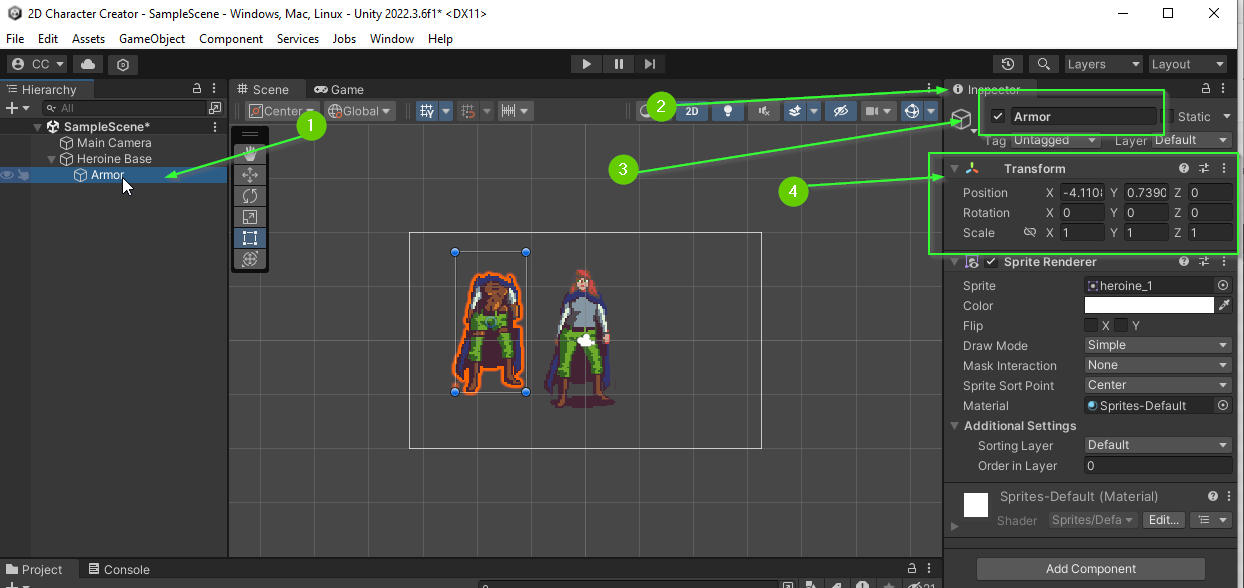
Using the Inspector
In the default view, the Inspector tab is on the right side of the Unity Editor interface. This tab displays information about GameObject or Asset that is currently selected.
- Click the
ArmorGameObject in the Hierarchy - Find the
Inspectortab - Verify that the
Inspectoris showing theArmorGameObject - Locate the
Transformcomponent
Updating the Transform
Because Armor is a child of Heroine Base its Transform component is relative to the Heroine Base. This means if we update the Position to be (0, 0, 0), it will be centered on the Heroine Base.
- Update the
ArmorGameObject’sTransform- It should be at
X: 0, Y: 0, Z: 0
- It should be at
Move the Heroine Base
With the Armor centered on the Heroine Base, you can now freely position the Heroine Base and the Armor will follow. Adjust the location of your Heroine Base as you see fit.
- Click the
Heroine Base` - Select the Move Tool
- Drag the
Heroine Basewithin the scene
Challenge: Add a Weapon
Using everything you learned, can you add a Weapon GameObject to the Scene?
- Add your desired weapon to the scene
- Rename the GameObject
Weapon - Nest
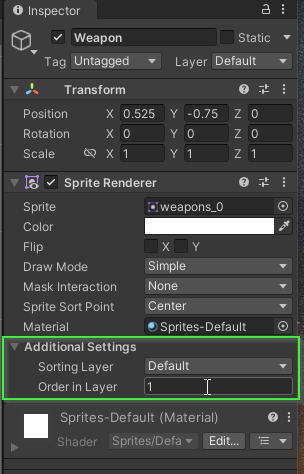
WeaponinsideHeroine Baseto make it a child - Adjust the
Weapon’s transform toX: 0.525andY: -0.75
Bonus: Your weapon may appear below the armor. You can fix this by adjusting the Order in Layer property under Additional Settings on your Weapon.
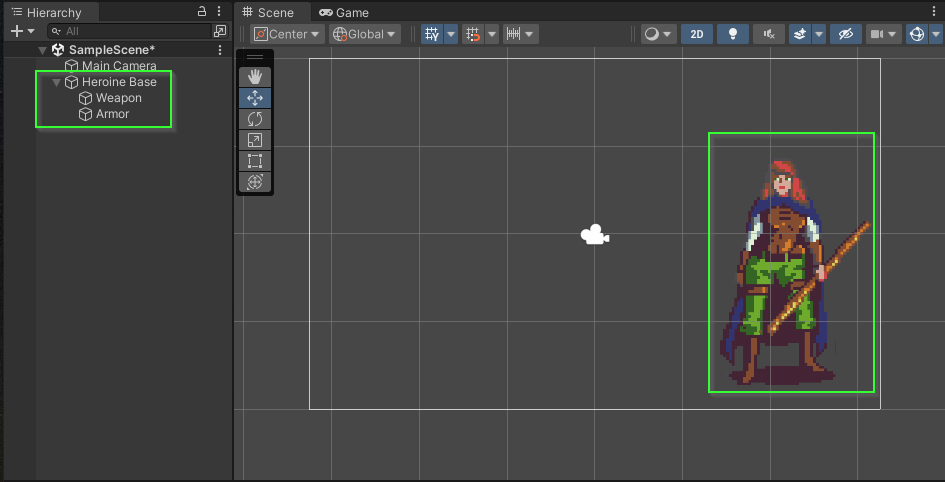
If all went well, you should have a scene similar to the one below:
What’s Next?
In Part 5: Sprite Renderer you will learn how to use the Sprite Renderer component to swap out sprites on an existing GameObject within your Scene.
Join the Discussion
Before commenting, you will need to authorize giscus. Alternatively, you can add a comment directly on the GitHub Discussion Board.