Part 6: Buttons
Table of contents
Adding a Button
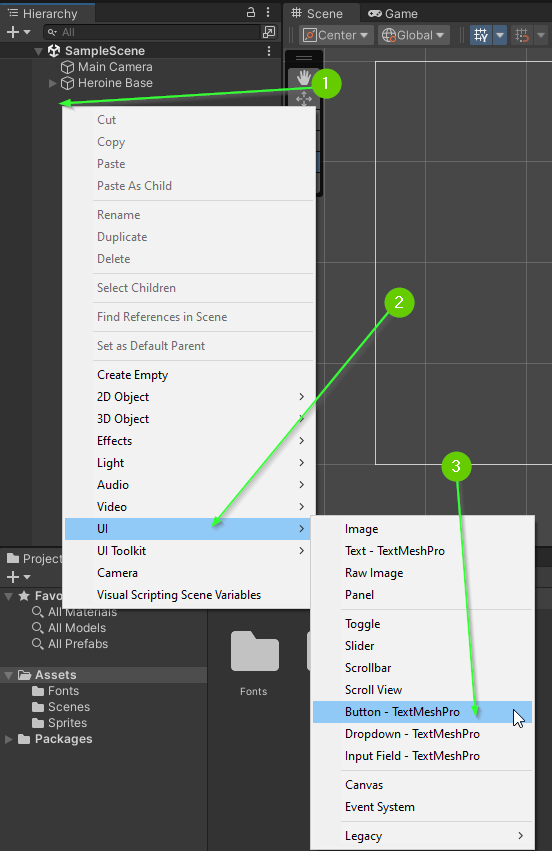
To add a Button to your scene:
- Right click in the Hierarchy
- Select
UI>Button - TextMeshPro
The first time you do this, a window will pop up asking you to Import TMP Essentials
- Click the
Import TMP Essentialsbutton
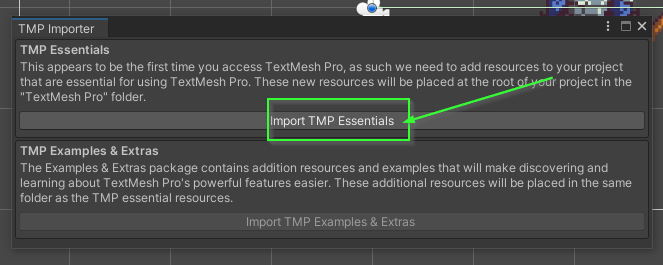
After a moment, the dependencies should be added. You do not need to import the examples. You can close the pop up.
If all went well, you have a MASSIVE button in your scene. Additionally, you’ll notice in the Hierarchy there are 3 new elements Canvas, Button, and EventSystem.
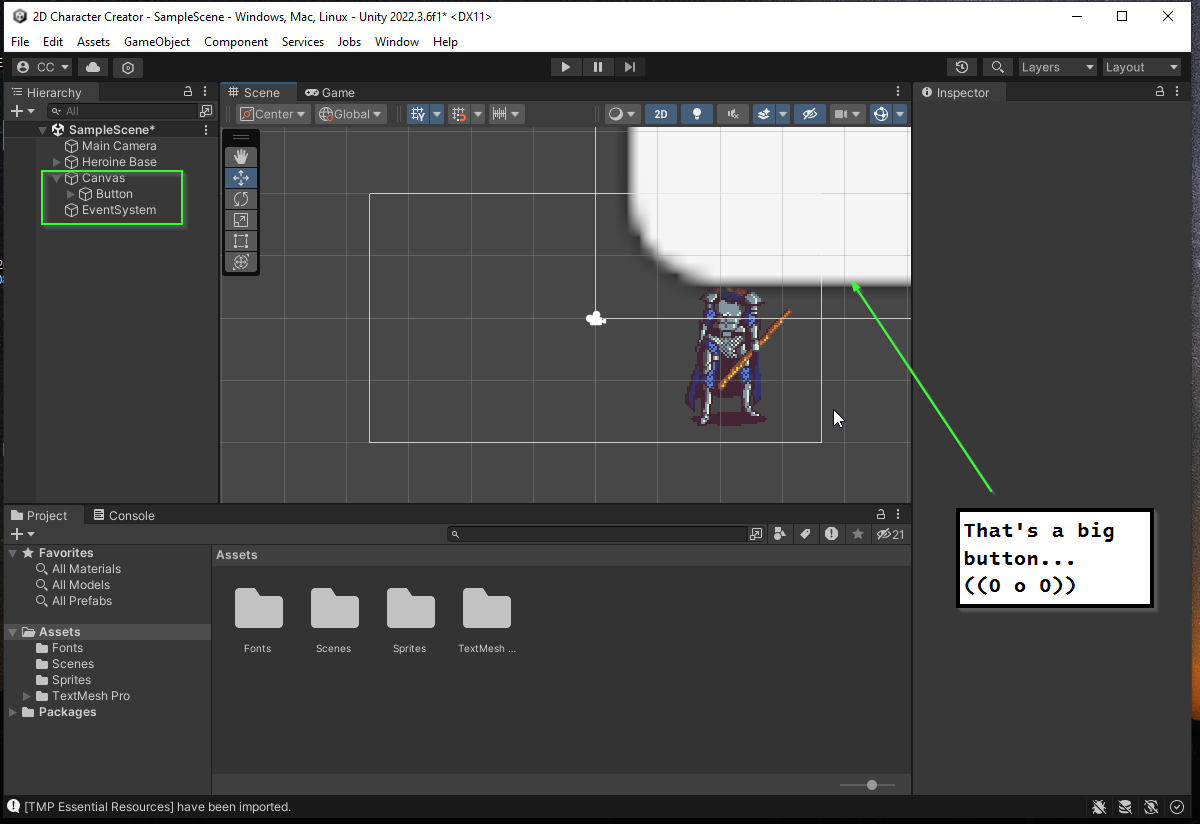
**Note: ** If you can’t see the button, you may need to scroll out to see it (it should appear quite large).
Canvas / Event System
A Button is a special type of GameObject that typically appears on top of normal GameObjects and requires a special parent called a Canvas. Additionally, because we typically want buttons to be clicked, Unity automagically adds in an EventSystem which will allow us to interact with buttons through clicking.
Specifying a Model Resolution
The Canvas allows you to specify how the UI (user interface) should react to different screen sizes. The size of a screen is typically referred to as a resolution and defines the size and density of a single pixel on a display. For our game, we will use what is typically called HD (High-Definition) which is a resolution of 1920x1080.
- Select the
Canvasfrom theHierarchy - In the
Inspectorlocate theCanvas Scalercomponent (you may need to scroll down) - Set the
UI Scale ModetoScale With Screen Size - Set the
Reference Resolutionto beX: 1920andY: 1080

Focusing in the Scene Tab
You are likely zoomed into the Main Camera’s current view which is not helpful for editing the UI for your players. You can manually zoom out but this is tedious. Instead, you can ask unity to focus on the Canvas in the Scene tab.
- Select the
Canvasin theHierarchy - Press the
FKey
This will focus the scene onto the selected game object. Alternatively, you can double click on the name in the hierarchy.
If you’d like to go back to focusing on the Main Camera you can select it in the Hierarchy and once again press F or double click on it. In fact, this will work for any GameObject in the Hierarchy
Button Properties
Your button is composed of two GameObjects the Button and a child component Text (TMP).
- Select the
Buttonin yourHierarchy - Click the
Expandicon to see the child component.
The Button GameObject specifies the shape of the clickable object on the screen and the Text (TMP) GameObject specifies how the text is displayed.
Rect Transform
- Select the
Buttonin theHierarchy - Find the
Rect Transformcomponent in theInspector

The Rect Transform defines the size and location of a UI element. Take a moment to play with these values.
Pivot and Relative Positioning
Because screen sizes can vary, it can be difficult to position elements perfectly on the screen. To help aid in positioning, we can specify the a pivot for which our position will be relative.
You can access the pivot menu by clicking the icon in the top right corner of the Rect Transform object.
- Select the
Buttonfrom theHierarchy - In the
Inspectorfind theRect Transformcomponent - Click the
pivoticon

This will open a window that allows you to easily specify how the Rect Transform should be placed relative to the parent container (in this case the Canvas).
If you press the Alt and Shift keys this will also move the specified GameObject AND update the pivot on that GameObject.
- Hold the
AltandShiftkeys try each of the 16 options to see how the pivot adjusts the button.
Challenge: Place the Button in the Top Left Corner
Can you adjust your button’s position to appear in the top left corner of the screen with a width of 300 and a height of 100?
When you’re done, your scene should look similar to this:

Changing Text
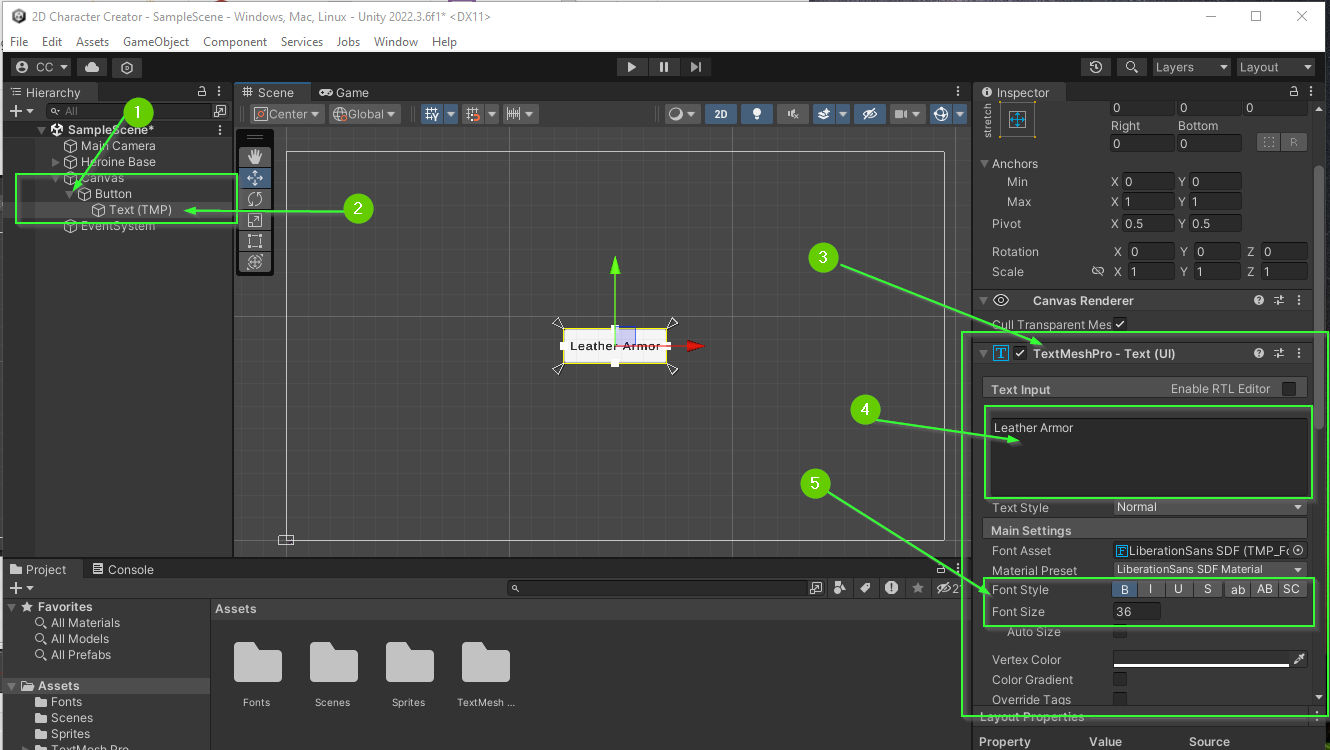
To change the text on a button:
- Expand the
Buttonin theHierarchy - Select the child
Text (TMP)component - In the
Inspectorfind theTextMeshProcomponent - Change the text in the
Text Inputarea - Adjust the
Font SizeandFont Styleto your liking
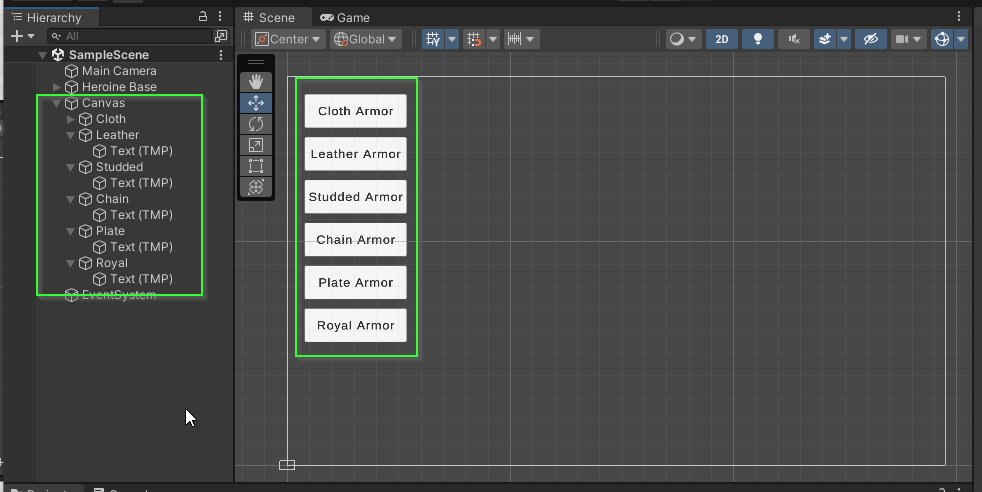
Challenge: Create Armor Buttons
There are 6 different armor options available.
Create 6 buttons, one for each armor option: Cloth, Leather, Studded, Chain, Plate, and Royal.
When you’re finished, you should have a scene that looks similar to this:
What’s Next?
In Part 7: On Click Event, you will learn how to utilize Unity’s event system to trigger changes to the character’s armor when a button is clicked.
Join the Discussion
Before commenting, you will need to authorize giscus. Alternatively, you can add a comment directly on the GitHub Discussion Board.