Part 8: Vertical Layout Group
Table of contents
Organizing Your UI Elements
Designing nice user interfaces and experiences is a huge challenge. You may have found it incredibly annoying and difficult to adjust your buttons on the screen to look nice. If this was the case, you’re not alone! To help aid you in your UI endeavors, Unity’s Canvas provides a handful of layout managers. In this part, you will use the Vertical Layout component to make it easier to display your Armor buttons.
Create a Container
Start by creating an empty Game Object in your Canvas to act as your armor buttons.
- Right click on your
Canvasobject in theHierarchyTab - Select
Create Empty
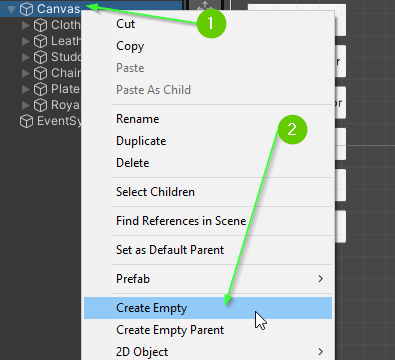
This will create a new GameObject that is a child of your Canvas.
- Rename the
GameObjectto beArmor Shop - Drag each of your Armor buttons within the
ArmorShop
Add a Vertical Layout Component
Next, you will add a Vertical Layout component to the Armor Shop Game Object. The Vertical Layout component controls how children are organized.
- Select your
Armor Shopgame object in theHierarchy - In the
Inspector Tabclick theAdd Componentbutton - In the search box, begin typing
Vertical Layout Group - Select
Vertical Layout Group
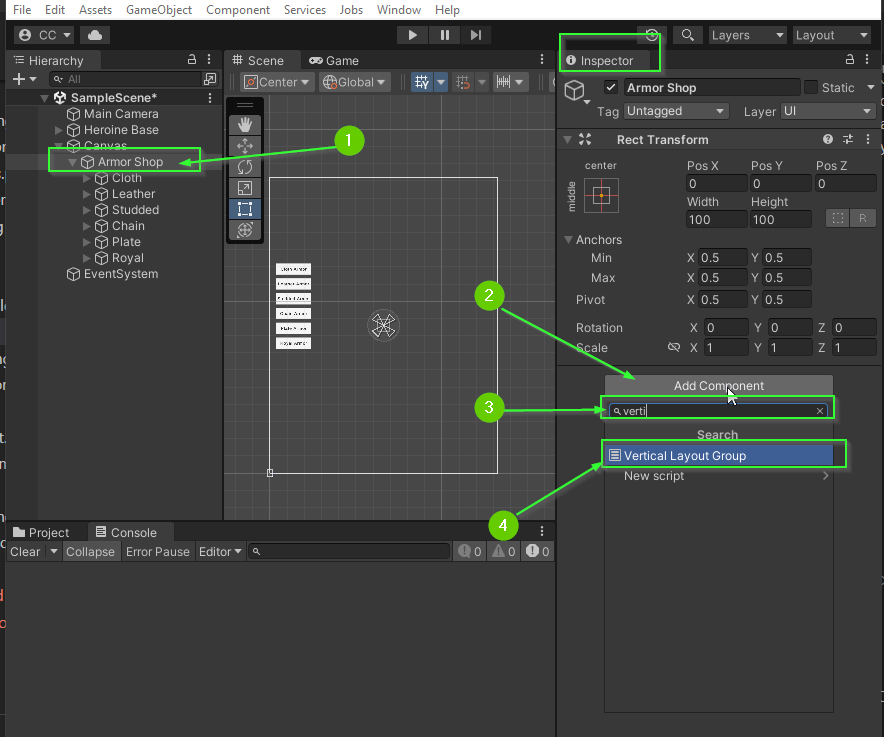
After doing this, your buttons will likely shift to be within the ArmorShop component.
Positioning the Armor Shop
By positioning and resizing the parent Game Object (ArmorShop) you can quickly and easily change the location of all the buttons within.
Play around with the pivot / position / size of your ArmorShop and observe how the children buttons reposition themselves.
Auto Sizing Children
The Vertical Layout Group has several settings that allow you to determine how the child components should resize and be spaced based on the parents size.
- Control Child Size: This option will cause the parent to automatically resize the child components to fit within the parent container.
- Padding: This option allows you to add space between the children and the parent container.
- Spacing: This option allows you to add space between each element. This works well if you are controlling the height of the children elements.
- Child Force Expand: This option determines if the children should be expanded to take up the entire contents of the parent. This is usually on if you’re controlling the height of the children.
There are several more options available that have different uses and purposes. For more details, you can read about them in the official Unity documentation: LINK
Challenge: Play with Vertical Layout Group
Explore the Vertical Layout Group options and find settings that you like.
Challenge: Create a Weapon Shop
Using everything you’ve learned so far, can you create a Weapon Shop menu?
- Create a Game Object container for your
Weapon Shopthat uses a Vertical Layout Group - Add 7 Buttons to the Weapon Shop, one for each weapon sprite
When you’re done, your project will look and act similar to the video below:
What’s Next?
In Part 9: Changing Shops, you will learn how to enable and disable GameObjects in your scene to switch between your two shop menus.
Join the Discussion
Before commenting, you will need to authorize giscus. Alternatively, you can add a comment directly on the GitHub Discussion Board.